Worried about making a mistake on your Egypt e-Visa application and risking rejection?
This step-by-step guide explains what to include at every stage, so you can apply for your visa with confidence.
With Egypt Visas Pro, you have the best chance of getting your visa approved—our team of visa experts will carefully review your application for errors.
Instructions for Filling Out The e-Visa Form
Egypt Visas Pro offers a simplified application process. Our Egypt e-Visa template is quicker to fill out, with a user-friendly design.
Here is a handy guide to help German speakers complete the form, so you can confidently travel to Egypt.
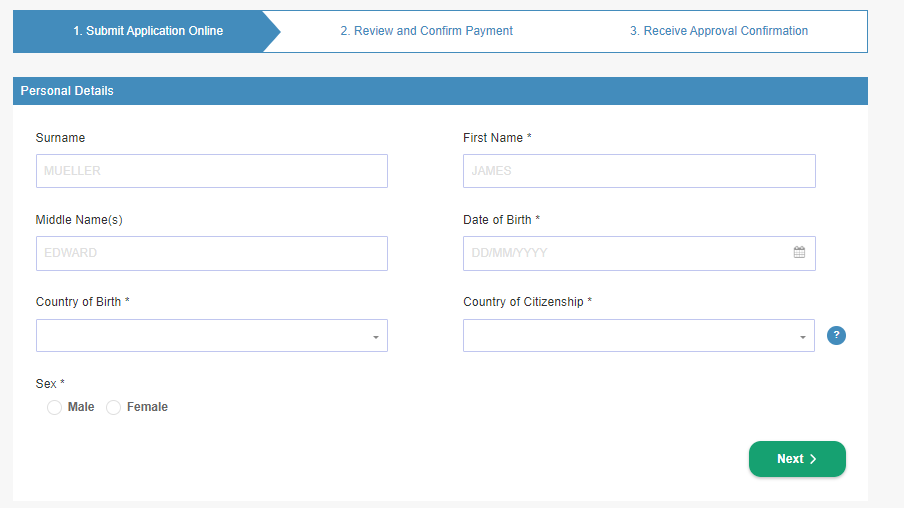
Step 1: Personal details
Begin by entering your middle name and first name exactly as they appear in your passport.
Make sure to type your surname as it’s written in the Machine Readable Zone found at the bottom of the biographical page of your passport.
Provide your date of birth, place of birth and nationality. Finally, select your gender, and click next.
Click on the blue question mark button beside certain fields for top tips on how to fill out the form correctly!
Step 2: Passport details
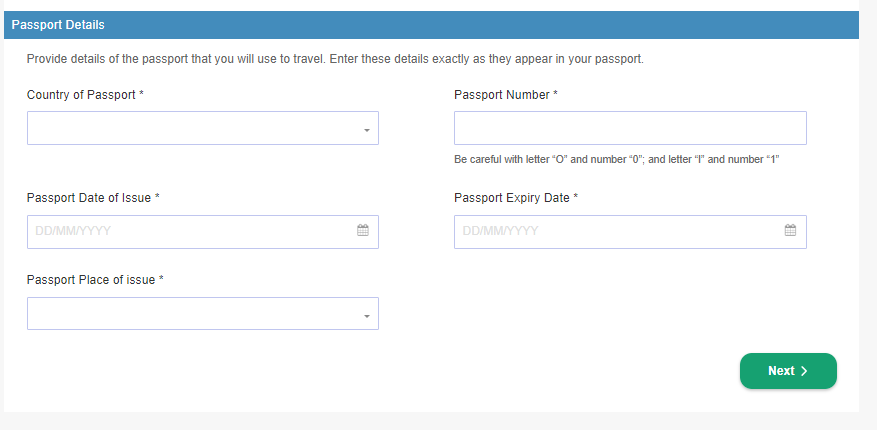
Next, you must provide your passport details. Start by selecting which country issued your passport, and then specify the issue date and place of issue. Enter your passport number and your passport’s expiry date, and click next.
When typing your passport number, make sure it matches your passport exactly. Pay special attention to the number 0 and letter O, and the number 1 and letter l.
Step 3: Contact details
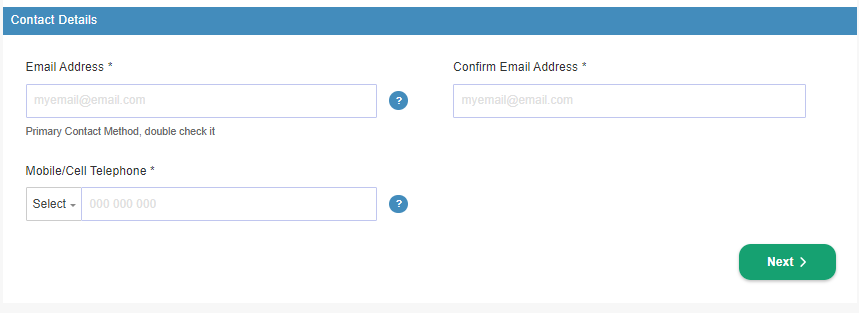
Enter your email address and then confirm it’s correct by typing it a second time. Then, input your mobile phone number, including the country code. Click next to continue.
Step 4: Travel details
Select if you will be entering Egypt once or multiple times with the same e-Visa. Then choose your planned day of entry and click next.

Step 5: Applicant declaration
Mark the first box to confirm that all information that you provided throughout the application process is correct.
Then, mark the second box to confirm that you have read and understood the general terms and conditions of Egypt Visas Pro.

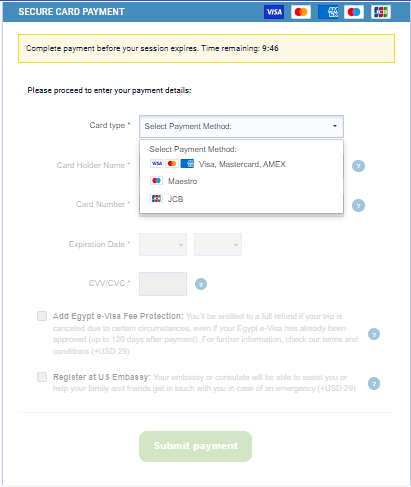
Step 6: Payment details
Next, you must provide your payment details. This is a simple process:
- Select the type of card you are using to pay for the e-Visa.
- Enter the cardholder’s name.
- Provide the card number.
- Specify the expiry date.
- Enter the CVV/CVC.
- Choose if you want to add** Egypt e-Visa insurance**. This entitles you to a full refund if your trip is canceled under certain circumstances.
Your payment is completely secure. Egypt Visas Pro uses advanced SSL encryption to protect your personal and financial information.
Step 7: Add supporting documents
Once you have paid, you will need to add a supporting document to complete the application process. If you’re a German, Belgian, French, Italian or Portuguese citizen, you can use either a passport or ID card. All other nationalities can only use their passport.
You can upload this document in any format, and we’ll make sure that it meets all requirements.
Receive your e-Visa
Within 1 to 6 days of payment, your Egypt e-Visa will be sent to you via email. The e-Visa is in English and Arabic, even if you’ve filled out your application form in German.
Double check all details on the e-Visa are accurate, print it out and present it on arrival!
Expert Tips for Applying for the Egypt e-Visa
Completing the Egypt Visas Pro application form is a relatively simple process. Nevertheless, it’s essential to enter all details correctly.
Here are our expert’s top tips for applying for the Egypt e-Visa.
Do not wait to apply
Applying for your e-Visa on the plane is not possible, as most applications take about 1–6 days to be processed. Make sure you apply at least a few days before your travel date.
With Egypt Visas Pro you can apply as soon as you like, we’ll send it for processing at the right time for your travel dates.
While it is possible to apply at the airport on arrival, this is not recommended as you may face long lines and risk your application being rejected.
Double check for typos
When filling out all sections, make sure there are no typos (e.g. make sure to enter your name exactly as it’s written in your passport).
Do not mix up the issue date and expiry date when filling out the passport section.
The e-Visa will be sent to your email address. Before submitting your application, make sure the address you provide is spelled correctly and that you have access to this email account.
Decide which visa is best for you
If you leave Egypt and want to enter again, you’ll need to apply for another visa. Save yourself time and money by ensuring you get the right type of e-Visa: single or multiple-entry.
Contact us for extra guidance
If you have any doubts during the application process, do not hesitate to contact us for extra help and advice.
You can reach out to us through various channels: use our contact form or email us


